https://www.facebook.com/lulubellescraftemporiumhttps://plus.google.com/u/0/107952312891897234795/postshttps://instagram.com/asplashofcolourbylucie/https://uk.pinterest.com/lucieloubell/https://twitter.com/stampinbellBell
Showing posts with label glossy accents. Show all posts

Get Well Soon with lawn fawn

Sunday, 6 September 2015

Hi stampers,
   If your like me i never have any get well soon cards pre made to send when needed! I always tend to make them when and if they are needed, but today I thought ahead and made a really cute get well soon card after being inspired by julia altermann (just-one-more-card.com) , who made a really cute card and video using similar stamps.

For my card project I used Lawn fawn's " get well soon" mini stamp set.


 I used Neenah Desert storn cardstock for the card base cut at 5 1/2 x 4 1/4 
 and for the background layer i used Neenah solar white cardstock, I randomly stamped the plaster/band aid images with momento dew drop ink rich cocoa all over , adding the pill bottle in soft sky and the nurse chick in tangelo , i  also stamped the hearts in tangelo and the smiley faces in grape jelly . I  then cut it out with Lawn fawns Small stitched rectangle dies to give it the lovely stitched edge.

I then stamped and masked the plaster/band aid  and nurse chick images onto a scrap bit of neenah solar white, which i coloured using my spectrum noir marker pens. i then fussy cut it out ,leaving a white border around it and glued to a piece of basic black cardstock, which i had die cut using the stampin'up oval framelits.  I embossed the sentiment on the black cardstock using versamark and  WOW superfine bright white embossing powder, which i heat embossed and then Using my gel pen i created a faux stitched line around the oval.

I cut a strip of basic black 1/2 inch wide and adhered that across the card  and adhered the oval and stamped images on top of that. i finished it of by using glossy accents on the nurses hat and the hearts.


Thanks for stoppin by

Happy crafting 

Lucie x  


Wishing you the happiest of Birthdays ......

Friday, 4 September 2015

Hi Stampers,

  I Made today's card twice as i was for my Twin Brothers , who will be 50!!! on september 4th.

I used Stampin'Up's Marina Mist cardstock for the card base , cut at 8 1/2 x 5 1/2, scored at 4 1/4
For the stamped layer I used Bristol watercolour card, cut using mama elephants basic die creative cuts scallop die.
I stamped and masked all the characters  from the Simon Says Stamp " Birthday Animals " stamp set in ranger archival black ink , to make my masked i stamped the images onto post it notes and fussy cut them out.
I coloured the character in white my Zig clean color real brush Pens and used my aquabrush to blend them out.
for the stamped star images i used stampin'up's daffodil delight and tangelo ink pads.
I used my glossy accents to go over the balloon, banner and present to give some shine.
Finally I stamped the sentiment  from the Avery Elle cake and candles stamp set in ranger archival black ink.
 and the card is done.....

Supplies used


Stampin'Up! ( contact your nearest demo to order)
Marina mist cardstock
 daffodil delight ink
tangelo ink

Happy Crafting 
Lucie x 


MFT Have a Beary special day shaker card

Thursday, 27 August 2015

Hi stampers,
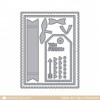
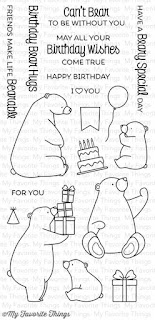
 For today's card project , I decided I wanted to make a shaker card using the MFT birthday bears stamp set  and the mama elephant love quotes die


 I just love how it turned out! I used my spectrum noir markers to colour in the bears, balloons and presents. 
For the card base I used whisper white cardstock and for the layers I also used whisper white card  and  Stampin'Up's coastal cabana cardstock. Which I cut using the mama elephants basic die creative cuts.


For the shaker part I cut the aperture using the mama elephant love quotes die, to which I attached acetate I then surround the aperture area with foam tape making sure I was completely enclosed ,so all the shaker elements, sequins, seed beads etc would not escape ! 
I stamped the happy birthday sentiment onto the shaker backer and filled the shaker. I then place and adhered all the stamped coloured and cut elements onto the front of the card.
I finished of by adding texture with my white gel pen and finally adding glossy accents to the balloons and presents.

Once it was all dry I put the card together and voila the card is finished! 

You will find clickable picture links to most of the products used below.

http://www.makethedayspecial.co.uk/shop.php#!/Basic-Set-Creative-Cuts/p/39533247/category=8719335

http://www2.stampinup.com/ECWeb/ProductDetails.aspx?productID=106549

http://www2.stampinup.com/ECWeb/ProductDetails.aspx?productID=114323

http://www.makethedayspecial.co.uk/shop.php#!/Love-Quotes-Creative-Cuts/p/34012596/category=8719335

http://www.makethedayspecial.co.uk/shop.php#!/Birthday-Bears/p/52227406/category=13602176

For Stampin'Up products, please contact your nearest demonstrator .....

Thanks for stopping by

Lucie x 


FREE BLOGGER TEMPLATE BY DESIGNER BLOGS